

Introduction: How to Build a Natural Dry Stacked Stone Free Standing or Retaining Rock Wall


I love rocks. Natural rocks. And I love rock walls. Big, small, retaining, free-standing... love 'em all. It sincerely breaks my heart every time I see a wall built with "stone" blocks courtesy of big box stores, inspired by DIY cable TV. They are everywhere, so my heart is frequently broken.
So I'm posting this instructable. If it keeps one hideous fake rock wall from being built, it's soooo worth the effort.
I use roughly the same technique when I build a free standing wall as I do a retaining wall. In fact, this wall was first a free standing wall (see last step for images). In my experience, if it's sturdy built, it will stand or hold back earth.
Note: I am not a professional anything, let alone a professional stonemason. I just do stuff. Sometimes unsuccessfully. I have built several walls and they still stand. But this, like most of my projects, is probably in violation of your local building code and may or may not be safe for the loads you intend to put on it. Works just fine for me, but it might not for you. Use your best judgement (on your own project, that is).
Also, I forgot to wear my gloves and safety glasses, but I am a very bad example of safe work habits (see DIY Sutures). Wear yours and work safely.
Step 1: Gather Your Tools & Materials
For our rock wall, we'll need
- Shovel
- Stakes
- String
- Line Level
- Tape Measure
- Spray Paint
- Rocks
- Hand Sledge
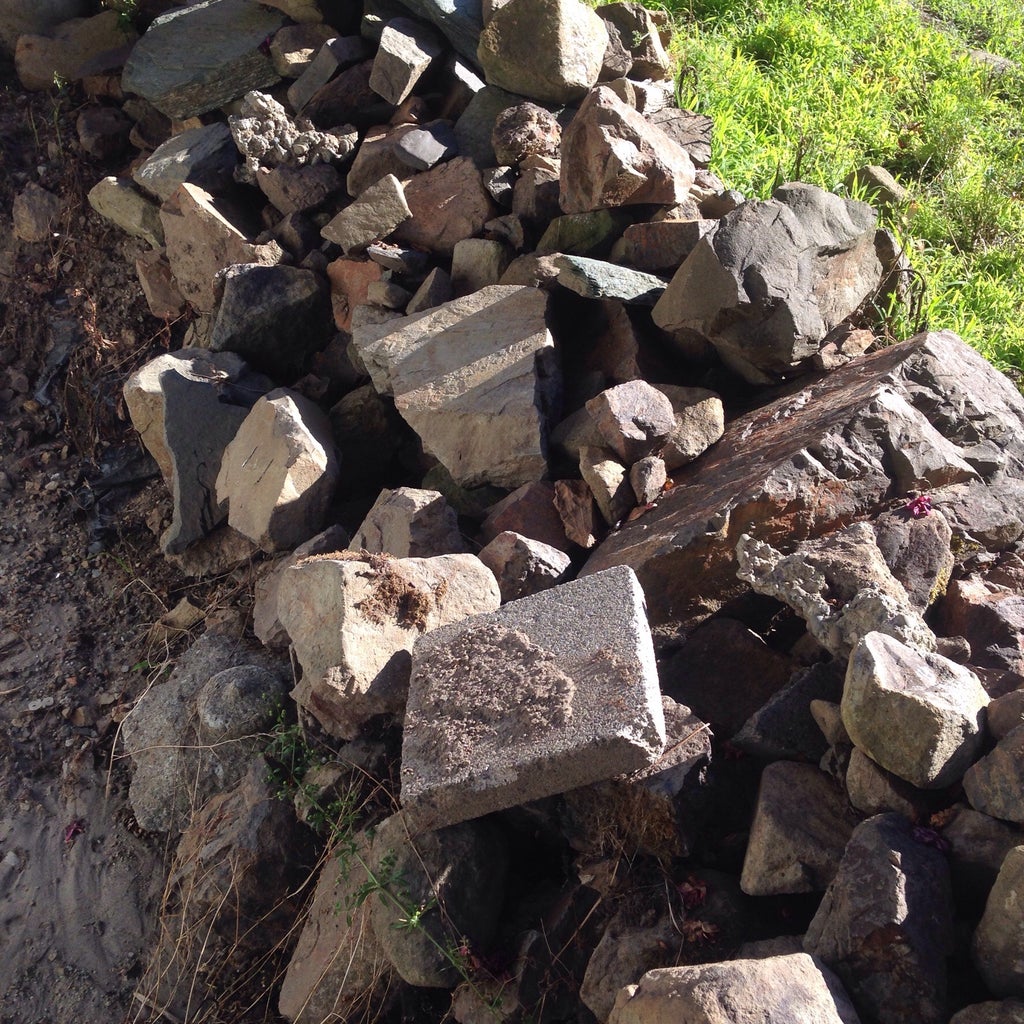
Get more rocks than you'll think you need. If you don't have rock on site, purchase from your local rock and landscape supply. Stick with material that can be found in your region. The idea is to make it look like it belongs. I started with the pictured pile, left in the yard by the previous owners. When I was done with those, I went looking for more about the area.
Rocks should be various sizes and shapes. You'll need shaping rocks (less than width of wall), tie stones (same width as wall), filler (for gaps and cracks), and caps (optional, flat stones for the top of the wall... gives it more a polished/finished look, if you're into that sort of thing)
Step 2: Prep Work


Sort your rocks by size and purpose. Put in piles near your wall site.
Plan the where and the how big of your wall. A 3' high wall should be at least around 2' deep. Lay out the position of your wall with stakes and string. Use spray paint for ground marking. I never do this at the beginning and end up running guide string later after deep stone wall parallax sets in and I can't see straight.
Dig a trench about 6" deep and roughly the width of your wall. The first course will go into the trench. If you have soft soil or are retaining something, dig a little deeper, lay down a gravel bed and some drain relief.
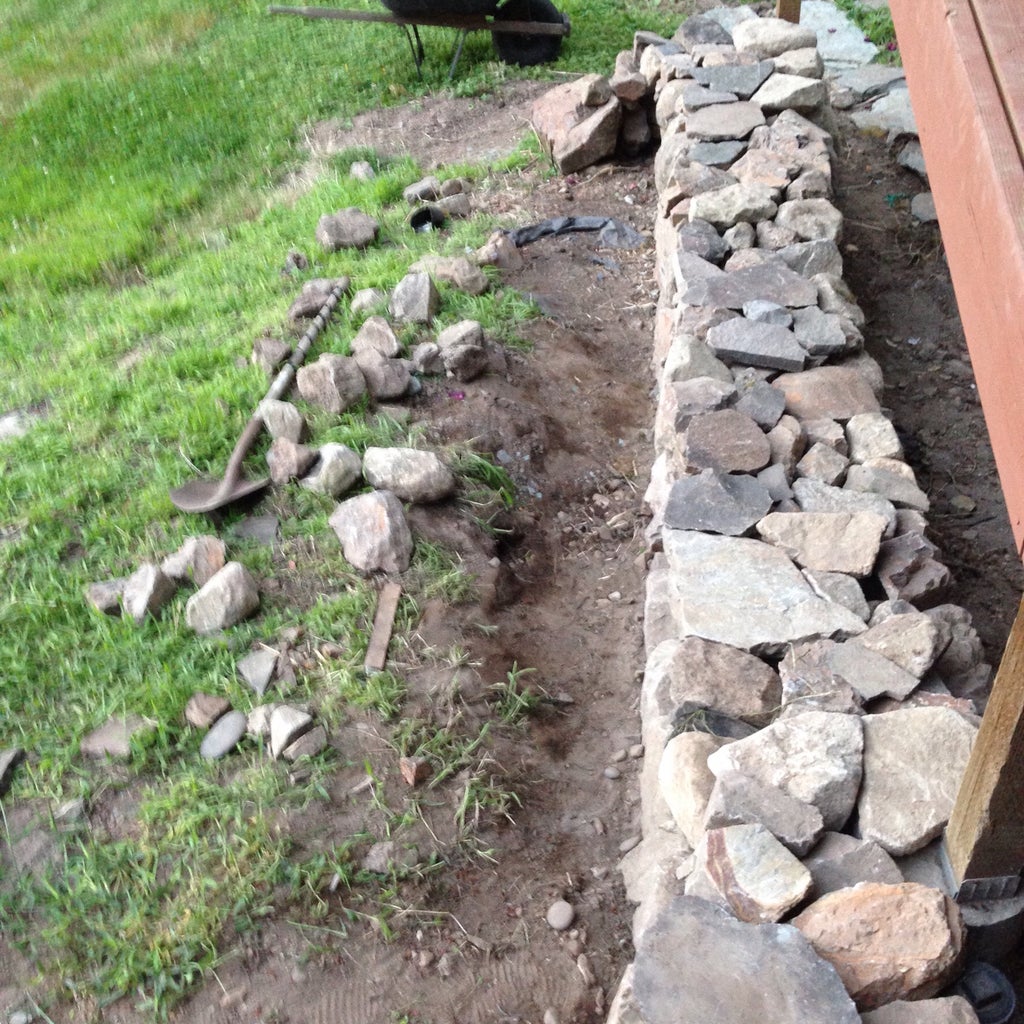
Step 3: Stack Rocks


Lay stones in two rows in the trench. Each row should be flush with the faces of the trench. Some gap in the middle is fine. Using stones similar in height will make things easier in subsequent courses.
Lay the second course. Same as the first, but start using tie stones (every 3' or 4'ish) in addition to your face rock. Again, tie stones are stones laid perpendicular to the wall length. If you have a corner, start there and work to the end. If not, just go end to end. Lay your rocks again in two rows, staggered to cover joints of the previous course. Once your second course is laid, fill center gaps with smaller fill stones. Don't place the fill, just throw it in. It'll find its way.
Repeat for subsequent courses. On the final course, you'll need to more carefully select the stones for the cap (to cover your fill and make it pretty in addition to being strong). If you're using capstones, lay a thick mortar bead down the center of the wall (keep mortar 6" or so from the faces) and place your capstones. I didn't use capstones here, but you might find them helpful on your first wall attempt. It really can make a pretty rough looking try a little easier on the eyes. Just keep in mind that it doesn't matter how good it looks if it falls down, so make structure your primary focus.
Stacking notes and tips:
You could really spend forever stressing out about the placement of each stone. What I do is identify what I believe to be a good stone for the next position and then place it. It will go somewhere. I very rarely put a rock back in the pile once I've picked it up, even if it doesn't fit where or how I thought it would.
If you get stuck and are turning every stone a thousand times looking for the perfect fit, pick up a medium to large sized rock. Heave it at the project. I swear it will find its home. I am not kidding. Kind of serves as a reminder to let the rocks have some say. It'll make for a tighter, sturdier wall to boot.
Maybe stacking rock will come naturally to you, but I don't think it does for everyone. Rocks are heavy. It's hard work. Give yourself a break and some time to learn as you go. My worse half thinks I stack a good wall because I "have an eye for it". I haven't corrected him, but that's really a whole lot of bs. I don't have an eye so much as I just work hard at it and have practiced with (literally) tons of stone.
Oh! And music helps get a person in a stacking rhythm. My favorite stacking song is Rage Against the Machine's "Killing in the Name"...
Step 4: Fill, Fit, and Finish


Unless you have very uniform rocks (how boring, right?), you're going to end up with gaps in the wall. Don't stress. Go back through and fill with smaller stones when you're done. Pound them in the cracks. Even if you break down and use some mortar, I won't judge. It can be our little secret.
Now admire your handy work. Great job! You are AMAZING.
Note: Like I mentioned earlier, I got done with my free standing wall and couldn't understand why I had even built it. Total mystery. It wasn't keeping anything out or in or serving as a garden border. Nothing. So I turned it into a retaining wall and evened out the treacherous grade behind it. I added more fill rock and a bit of gravel to the "retained" side. Finally I filled flush to the top of the wall with fill dirt and laid down some sod. Now I can mow or even walk on that part of the yard without falling or rolling an ankle. Yay! Anyway, point is that sometimes the finish isn't where you thought it'd be. So keep a little flexibility and try not to get too frustrated. Cool?
Oh, and keep doing stuff awesome (like you always do)!

Second Prize in the
Backyard Contest 2016


